T02:- How to setup the Qualcomm Neural Processing SDK
Setup of Qualcomm Neural Processing SDK
We will now understand how we can setup the Qualcomm Neural Processing Engine SDK in our system
-> To start with first thing we have to understand what is required for this setup.
1. Oracle Virtual Box https://www.virtualbox.org/wiki/Downloads
2. Ubuntu 20.04 https://releases.ubuntu.com/focal/
We can also work with WSL2 environment that will work on Windows 10/11.
3. Any Machine Learning Framework
3.1 Tensorflow
3.2 Pytorch
3.3 Tensorflow lite
3.4 Onnx
4. Android NDK
5. Microsoft Visual C++(Resdistrubution)
So now we will go to the practical aspect of the setup of the Neural Processing SDK(SNPE).
1.We will first download the Virtual box as per the requirement.
1.1 Here is the link for the download https://www.virtualbox.org/wiki/Downloads
1.2 After downloading of virtual box we will first download the Microsoft visual C++ redistribution
Here is the link https://aka.ms/vs/17/release/vc_redist.x86.exe
You can download Microsoft visual c++ according to your system architecture.
1.3 After downloading the both we will now download the Ubuntu 20.04 in our system https://releases.ubuntu.com/focal/
2.1 We will now create the a new virtual machine.
-> It will open like this below image .
-> After that step we will see a new interface like below one image.
-> In the second section we will choose the folder where Virtual box is present.
-> In the third section we will choose that Ubuntu ISO file which is present in file Folder.
Now we can click onto the Next step which will be in the interface.
After this step we will jump into the Profile section of the Virtual Machine.
The image will be like this below one :-
-> Then choose the Strong password.
Then click on to the Guest Additions(Improves performance and usability of Virtual Machine(VMs)
running in Virtual Box).
After this step we will define the Virtual machine resources.
The interface will be like this below one:-
-> You can drag the slider only till the green marker on both Base Memory and Processors.
-> For better performance of the Virtual Machine we can choose 4 processors and 4096MB(base memory).
Now click onto the Next button.
Now click onto the Next button.
We will get this type of interface .
->You can Disk size according to your requirement(But the required disk size is 60 Gb )
Now Click onto the Next button
After this step we will now get this type of interface .
Now click onto the Finish Button .
It will prompt into the Ubuntu Interface like this one .
Now ,we will setup the Neural processing SDK through the Terminal.
->You can press (CTRL + ALT+ T) for terminal .
->After opening of Terminal .
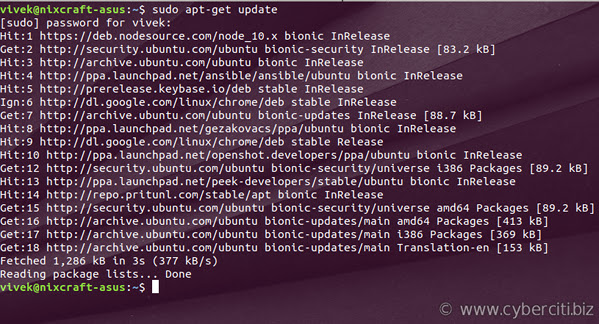
We will run these commands .
configured sources and updates the package index).
->Now after complete installation of Ubuntu ( You can now go to the Qualcomm Neural Processing
SDK website).
-> There will be a download button from there you will login to the Qualcomm Neural processing SDK Website.(You will follow this only on the Virtual machine Browser not on the Windows).
-> Now we will see the steps required for the installation of Qualcomm package Manager.
You will run these commands into your Virtual machine terminal.
Install QPM3 from https://qpm.qualcomm.com/#/main/tools/details/QPM3
Run this command for Qualcomm Manager file
1.1 sudo dpkg -i QualcommPackageManager3.3.0.97.2.Linux-x86.deb
After this we will run this step for the login to the SNPE SDK.
1.2 qpm-cli --login.
It will prompt for username and password of your Qualcomm account.
After that step you will be running this command for activating the license.
1.3 qpm-cli --license-activate qualcomm-neural processing_sdk.
After running above command you will get an error message that your account is not activated something like that then you have to go to this website and activate all your license
After activating your license you can run this below command for downloading and extracting the qualcomm neural processing SDK.
1.4 qpm-cli --extract qualcomm_neural_processing_sdk.
After all those steps your Neural processing Sdk will be installed to your specific folder.
And you will get some path like this below one.
SNPE_ROOT :- /opt/qcom/aistack/snpe/<version>.
From the next blog we will begin to understand how we can convert given machine learning model into dlc. Stay with us for the next part....
-

.png)


Comments
Post a Comment